| Technical Articles |
|
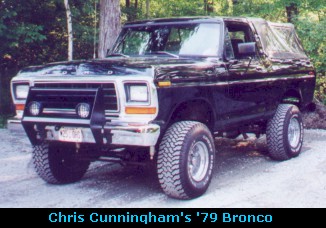
Low-Cost Interior Upgrade Tips & Tricks -- by Chris Cunningham |
|
Ever since I put bigger tires and louder dual exhaust on my truck, the interior noise level was very annoying over 55-60 mph. I even bought a louder set of speakers so I could here my radio! A couple days ago, I took down the thin cardboard headliner and replaced it with a piece of 1/8" hard-board with speaker carpet glued on it (I used Elmer's spray adhesive). The next time I drove it I couldn't believe how quit it was at highway speeds. It was such a big difference I forgot I even replaced the headliner and was trying to figure out what it was, then, it dawned on me. There are hollow channels that run from the headliner area down the rear door post and out the bottom. This is were all the noise was coming from. Anyway I just had to tell everyone about my amazing discovery. It's just too good to keep it to myself!
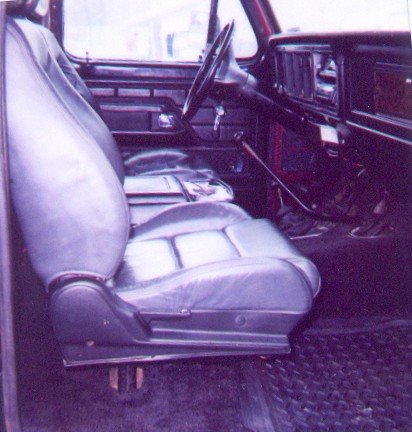
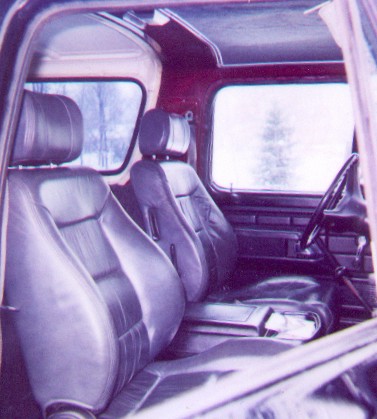
I'm sure you've seen all the beautiful, comfortable seats nowadays in the newer SUVs and wish you could just lift them out and put them in your truck. Well, you can! Simply unbolt your seats and remove them but save the brackets that bolt to the bottom of the chair itself. There should only be 4 bolts per chair. Now is a good time to paint the brackets to match your carpet or the new seats. Now go to a junk yard and pic out the perfect set of seats for your truck. You can use almost any seats that you want to as long as they're buckets (and better than the ones you took out of your truck, of course). I found a seventy year old guy out here in upstate NY that has 7 or 8 sheds full of brand new looking car and truck seats that came from wrecks. I picked up a set of charcoal vinyl buckets out of a 90 Honda for $60. When installing the new seats, take the brackets off of the new seats you found (again usually 4 bolts per seat) and see if the holes match up with your Bronco's original brackets. Mine didn't match up perfectly but with a little drilling and wedging, I had a nice set of buckets for my truck for just $60.00. Happy hunting!
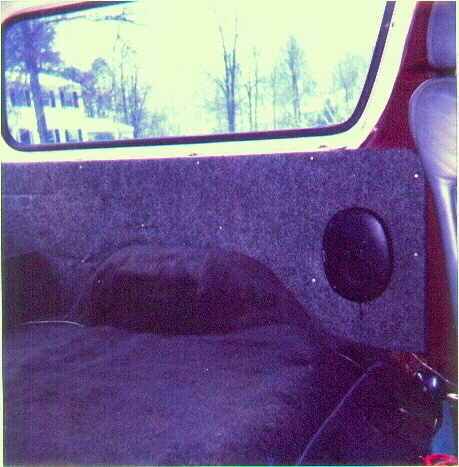
I know everyone wants to spruce up those cheap looking pieces of cardboard that Ford calls a trim panel on the sides of the cargo area. This tip is simple but the result is awesome. Take that scratched up piece of cardboard and lay it down on a piece of 1/4" plywood. Use it as a template to leave a nice outline. Hold on your not done yet, you might want to take a marker and mark all the screw holes including the armrest. You can do both pieces on one piece of 4x8 and have enough on the end for the tailgate panel. Cut it out as good as you can and drill out all the holes (before you put the carpet on so they are easy to locate). This is also a good time to cut out any speaker holes you might want. You will find the perfect piece of carpet at www.crutchfield.com for $20 that will cover both panels and the tailgate panel. They carry materials to build speaker boxes. You might need a hand holding the carpet tight on both ends, lay the cut out piece of wood on the carpet in the place you want it. Trim around the wood leaving a couple of inches to work with. Using an ordinary staple gun, work your way around the edges starting with the long straight top edge. As you go around the turns it will want to fold to compensate for the turn. Just let it fold but keep the folds to a minimum. Carefully remove the V -shaped piece, the carpet hides this well so you shouldn't be able to see the seem. Add staples as necessary to hide the seem. Slap it back on your truck and be proud of yourself. Total cost: about $35.00 depending on how much the plywood is were you live.
|
 Index: